Thursday, March 27, 2008

Poaca


These are just plain delicious. They are great straight out of the oven or for a few days afterwards as a healthy snack.

Dough:
1 cup plain yogurt
1 cup olive oil
teaspoon salt
1 package of baking powder (5 teaspoons)
3 cups flour

Filling & finishing:
1 egg
1 cup chopped parsley
1/2 cup crumbled cheese (I usually use feta-type cheese, but be creative. Would also be good with grated mozzarella, parmesan, or perhaps even blue cheese)
a sprinkle of dry dill or a few tablespoons of fresh chopped dill
a sprinkle of black pepper
a sprinkle of ground cayenne
sesame seeds
---------------
For the dough, mix all ingredients together and knead well for a few minutes. Set aside and let rise 30 minutes or more (up to a few hours is fine)

Prepare the filling:
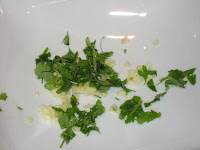
Mix together parsley, cheese, dill, egg white (save the yolk), black pepper and cayenne.

Break off walnut-size pieces of the dough and form into a ball. Squash each ball in the palm of your hand to form a round of dough. Put in a small amount of filling (a teaspoon at most) and fold over, then seal closed by pressing the edges of the half-moon together. Place pastries onto a baking sheet lined with baking paper. They can be relatively close together, as they won't expand much.

When you've filled all the rounds, brush each one with egg yolk and sprinkle with sesame seeds.

Bake at 175 Celcius (around 350 F) until golden - make sure the bottoms of the poaca are also golden in color. If they are still white, they are not done yet.

These look like they are a lot of work, but they are not - that being said, they take much longer to make than they do to eat!

Monday, March 3, 2008

Bulgur Pilav


This dish may seem to have a lot of ingredients for an everyday side dish, but it's actually very simple and quick to make. Everyone I have made it for likes it, even my dad... and even though he eats everything, he doesn't always like it! My son likes it, too... definitely worth a try.

Ingredients:
1.5 cups onion, diced medium
4 tablespoons olive oil
2.5-3 cups fresh diced tomatoes OR 2 cups canned crushed tomatoes (with no added salt or flavorings) plus 1/2 cup water. Do not use canned diced tomatoes.
1 tablespoon dried mint OR 1/2 cup chopped fresh mint
1 teaspoon dried dill OR handful of fresh chopped dill
1 tablespoon dried parsley OR 1/2 cup chopped fresh flat leaf parsley
1 teaspoon salt
1 teaspoon sugar
1.5 cups large grain bulgur

_____________

In a skillet or pot with a tightly-fitting lid (without vent hole), saute onions in oil over medium heat until transparent but not browned. Add herbs and stir. Add tomatoes, salt, sugar, and stir. Cover and cook for four or five minutes. Add the bulgur, stir, and cover. Turn off the heat immediately if you have electric burners. If you have gas burners, cook on the lowest flame for five minutes, then turn off heat. The bulgur will absorb the liquid from the tomatoes in about half an hour, and then this dish is ready to eat.

I highly recommend that you use fresh tomatoes for this one, even if they are flavorless winter ones...


Sunday, March 2, 2008

Vera's Ukranian Borscht (almost)


I will admit it - I am not a fan of beets. Until one of my former students made this for me, I would probably have avoided the things my whole life. They are very easy to avoid, but they are extremely good for you. They help protect against colon cancer, heart disease, and are also high in folate, making them especially important for pregnant women. For more information about how incredibly good-for-you beets are, click here. This recipe also contains a pretty potent quantity of garlic, so if the beets don't convince you, click here to learn about the health benefits of garlic.

Even without the health benefits of this soup, it is worth making because it truly is delicious and easy.

Ingredients:
3 medium sized beets, peeled, quartered, and sliced into 1/4 inch slices
3 tablespoons olive oil
1 medium onion, halved and sliced thin
3 tablespoons tomato paste
2 tablespoons fresh chopped flat leaf parsley for each serving
1 crushed or minced garlic clove for each serving
salt to taste
one large potato, in 1 inch cubes, if a heartier soup is desired (I usually omit it)

------
Conventional instructions:

In a large soup pot, place sliced beets (and potatoes, if desired) and about 10 cups of water. Bring to a boil, and then cook until beets are soft, which will take around half an hour (maybe more - you'll have to taste one). When beets are almost done, in a separate pan, saute onions in olive oil until transparent. Add tomato paste and stir, then cook for one more minute. Take a ladle of liquid from the soup and add it to the tomato paste-onion mixture, then pour it all into the large pot. Add salt, to taste (it will need at least a tablespoon. Alternately, you could add vegetable or chicken bouillon, but this will change the taste).

Put parsley and garlic into serving bowls, and pour the soup over. Serve.

This soup will taste better the second day, but will lose its flavor the third, so if you're not going to eat this all the first or second day, you can freeze some of it.

Pressure Cooker Instructions:

Put beets, a teaspoon of oil (to discourage foaming) and water (and potato, if desired) into your pressure cooker (making sure not to fill it more than 2/3 full). Follow your pressure cooker's instructions for closing and sealing. Bring to high pressure, then cook for five minutes. Remove pressure cooker from heat and use the natural pressure release method.

Saute onions in olive oil until transparent. Add tomato paste and stir, then cook for one more minute. Take a ladle of liquid from the soup and add it to the tomato paste-onion mixture, then pour it all into the large pot. Add salt, to taste (it will need at least a tablespoon. Alternately, you could add vegetable or chicken bouillon, but this will change the taste).

Put parsley and garlic into serving bowls, and pour the soup over. Serve.

This soup will taste better the second day, but will lose its flavor the third, so if you're not going to eat this all the first or second day, you can freeze some of it.

Monday, February 25, 2008

Really Green Salad with Goat Cheese Croutons


Ingredients:

fresh leaf spinach (about 4-5 large handfuls per person)

avocado, about 1/2 per person

goat feta cheese, or log of fresh goat cheese

1 egg

1/4 cup sesame seeds

balsamic vinegar

olive oil

honey

salt

_____________________


For dressing: for each serving, place 3 tablespoons of balsamic, 4 tablespoons of olive oil, one tablespoon of honey, and 1/4 teaspoon salt into a small saucepan and slowly bring to a boil.


For cheese croutons: Heat oven to 375F. Cut cheese into large cubes or slices. Beat egg in a bowl and pour sesame seeds onto a plate. Dip each piece of cheese into egg, then coat with sesame seeds. Place on baking paper or foil, on baking sheet, and place in oven for five minutes.


While warming the dressing and cheese, wash spinach well and remove any tough stems. Peel and dice avocado into large chunks. Place spinach into large bowl and toss well with hot dressing (stir the dressing well before pouring). Spinach will wilt. Distribute spinach onto plates and top with avocado pieces and cheese croutons.


Add grilled chicken or turkey strips, if you so desire (this is a good use for leftovers!)


Add caramelized pears, if you like to mix sweet and savory!

Caramelized Pears


It does not take many ingredients to make this easy dessert, but it looks really impressive. As if that's not enough, it's also very healthy.


  • 1 pear per person
  • about a tablespoon of white sugar per pear
  • optional: whipped cream, vanilla ice cream, or vanilla sauce

Directions

  1. Halve pears lengthwise; remove cores. (A melon baller removes cores easily, but a small spoon works, too.) Place sugar on a plate.

  2. Heat a large skillet over medium heat. A regular (as in not non-stick) skillet works best here because you can see when the pears start to caramelize. Press cut side of each halved pear in sugar. Place cut side down in skillet. Cook until beginning to brown, 7 to 8 minutes.

  3. Add 1/2 cup water. Cover; simmer until pears are tender, 5 to 10 minutes (depending on ripeness), adding more water if sugar begins to burn.

  4. If liquid in pan is thin, simmer until thickened to a saucelike consistency; if it is thick, add more water. Serve sauce over pears.

  5. Serve pears with a dollop of whipped cream, vanilla ice cream, or vanilla sauce. Even without this addition, these are amazingly simple, delicious, and not even bad for you! You could even serve the pears on top of the spinach salad recipe (see salads category)

Sunday, February 10, 2008

Baked Brussels Sprouts


You say you don't like brussels sprouts but wouldn't mind liking them? If this easy and delicious dish doesn't do it, nothing will. I have always had my brussels sprouts steamed, with butter and I have always liked them that way. But then I heard something on NPR about making them crispy in the oven. I tried it, and they came out even better than I expected. As they lay on their baking sheet, waiting for the other elements of dinner to be ready, everyone who walked by was popping them into their mouths, and about a quarter of them were gone before the rest of dinner was on the table. That is something you might expect for fries, not brussel sprouts! I urge you to try these while they're in season:


Ingredients:
Any quantity of brussels sprouts, dirty or grainy outer leaves removed, cut in half lengthwise (so that each half gets part of the base, and they thus don't fall apart) and soaked in salted water.
olive oil, to coat
salt and garlic powder, to taste

Preheat oven to 400 degrees F/around 200 degrees C. Drain the sprouts and toss them in the olive oil, then sprinkle with salt and garlic powder. Spread them on a foil-lined (for easier cleanup) baking sheet, cut side up. Roast in the oven for 30 minutes, or until they are browned but not burned. Serve.

I recommend that you make more than you think you want to eat because believe me, they will be better than you expect!

Wednesday, February 6, 2008

Bara Brith

This recipe is from my Aunt Diane, who lives in England, close to Wales. I will convert the measurements to US measurements soon...


(Bara Brith means speckled bread in Welsh)
450g strong plain flour
4 level teaspoons dried yeast
225ml milk
50g brown sugar plus 1 teaspoon
1 level teaspoon salt (I'd miss this out, try to keep salt out of my diet)
75g butter or margarine
1 size 2 egg (large)
1 level teaspoon mixed spice
350g mixed dried fruit
a 2lb (900g) loaf tin well greased
Method
First warm the milk in a small saucepan till it's hand hot, and then pour into a bowl. Whisk in 1 teaspoon of sugar, followed by the yeast, then leave aside in a warm place to froth for about 15 minutes. Now, sift the flour and salt if used into a large mixing bowl and stir in the rest of the sugar.
Then rub the fat into the dry ingredients until the mixture looks like fine breadcrumbs. Stir in the mixed spice, pour in the beated egg and frothed yeast and mix to a dough. Knead the dough on a floured surface until smooth and elastic (about 10 mins) and put back in bowl, cover with clingfilm or a cloth. Leave in a warm place to double in size - about one and a half hours.
After that ,turn the dough out and knock it down to get the air out, then gradually knead the fruit in and pat out to a rectangular shape. Roll it up from one short side to the other and put in the loaf tin (seam side down). Place the tin inside an oiled plastic bag and leave to rise, until the dough has rounded nicely above the edge of the tin (about 30 - 45 mins). Meanwhile preheat the oven to gas mark 5 (375 F) (190 C).
When the dough has risen and springs back when pressed lightly with a floured finger, remove the polythene bag and transfer the loaf to the oven and bake on the shelf below centre for 30 minutes, Then cover the top of the loaf tin with foil to prevent it overbrowning, and continue to bake for a further 30 mins. Turn the loaf out, holding it in a teacloth in one hand and tapping the base with the other. It should sound hollow - if not pop it back withour the tin for a further 5 mins. Cool the loaf on a wire rack and brush the top with clear honey, to make it nice and sticky, before the loaf cools. Slice thinly and serve buttered.